

 |

Our house was built in 1986 and the owners who bought the house during the major house boom did some work updating the place but it still has a long way to go. This fireplace is all rough cedar. The photos don't really show how bad the wood actually looks. It was originally, and if you look at the top still is, very orange and if you touch it you will end up with about 30 splinters in your hand. I stained the bottom with a walnut stain hoping that would update it a bit but it only made it worse! It turned black in spots and wouldn't take stain at all in others. Why I didn't notice this before staining half the fireplace I'm not sure.

When we moved in pictures were hung where there were nails to get them off the floor and so far all I've done to this room is paint the built-ins and I had the handy man put crown molding along the top. The walls will be painted the gray/blue you see smudged on the wall. It is Ice Cap by Benjamin Moore.

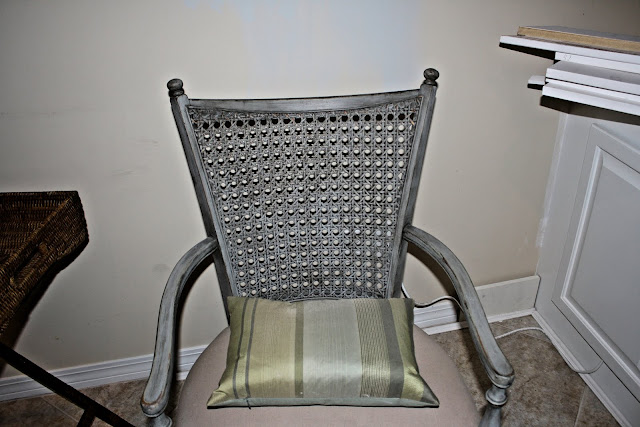
The plan right now is to try and faux paint all the wood planks on the fireplace similar to how this chair was painted and have a more up to date mantel build. If the paint doesn't look good we can try to lay thin wood floors over the top. It's tricky because the built-ins are built up to the paneling on the sides and would need to be removed in order to completely replace the wood. That is not something in the budget right now! We have to work with what we've got since there is a lot more house that needs to be updated after this room!
Unfortunately vertical blinds didn't make the 80's comeback. I will be making linen drapes in a neutral color that will have a reverse pleat and will be lined and padded so they hang just to the tile and pile nicely together without looking bulky. They will also have hand sewn rings attached to make closing easy.
The ceiling is popcorn and has a lot of damage so the carpenter will be laying tongue and groove pine on the ceiling that will be painted white as well as a couple of beams. I really like the traditional cottage look! The drapes will then be hung 2 inchesbelow the ceiling to add some balance to this wall. The fan will be replaced with a large chandelier. The hubby is not happy about that one!

My wonderful husband will be redoing the casings on all the doors and windows in this style.

He is also adding wainscoting to the room that will look similar to this without the picture shelf.
Unfortunately we don't have a lot of time to worry about remodeling so these projects take a VERY long time but I will show you updates as things move along. Here are some of my favorite decorating inspirational pics in the meantime.
You can find the source by clicking on the photo.
Are you working on any house projects?


No comments:
Post a Comment
Thank you for your comments! It so great to hear from you and it is what keeps me motivated to create.